 Home
HomeHammerite Deathmatch
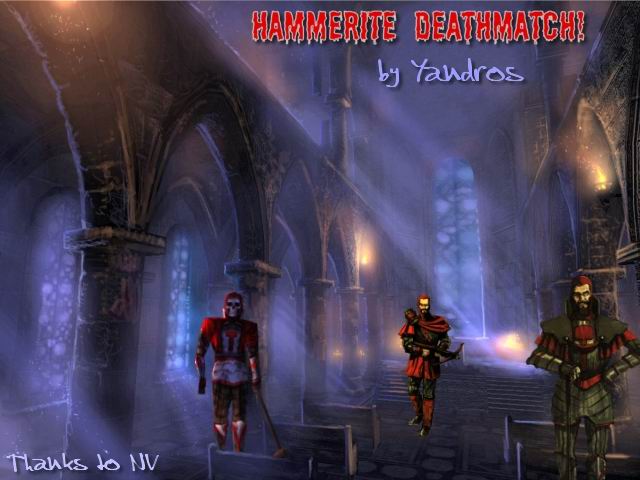
Hammerite Deathmatch
An FPS-Style FM for Thief 2
By Yandros
Release Date: 11/16/07
Version: 1.0
Website: http://www.wearytaffer.com
Mission Base: Circulation of Shadows (now abandoned as a T2 mission)
Build Time: 3 months starting from CoS Alpha 2
Language Support: English
Scripts: All necessary custom scripts are included
Mission Info
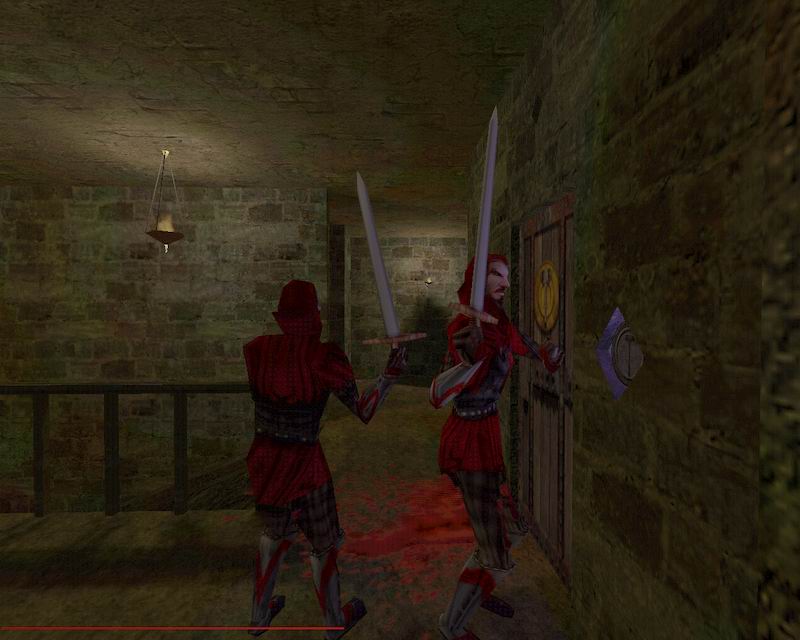
Mission 1: Last Man Standing
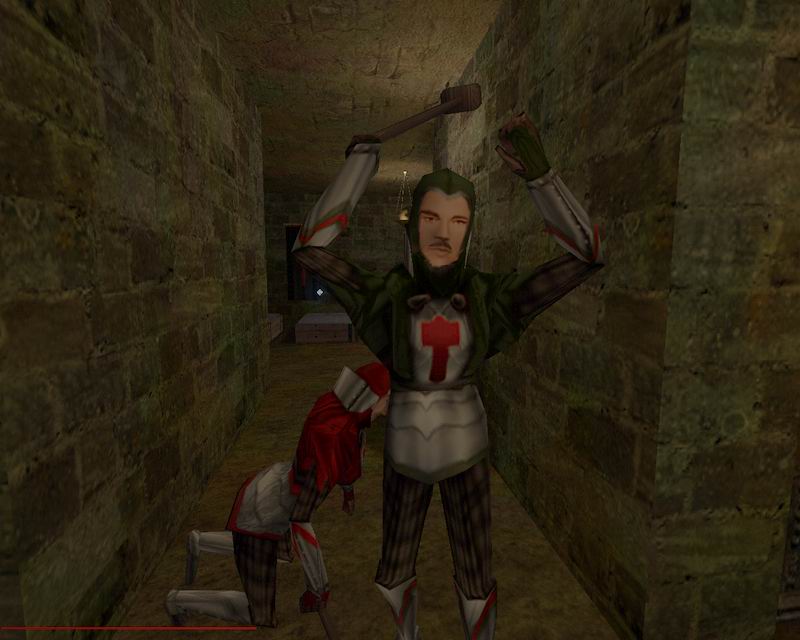
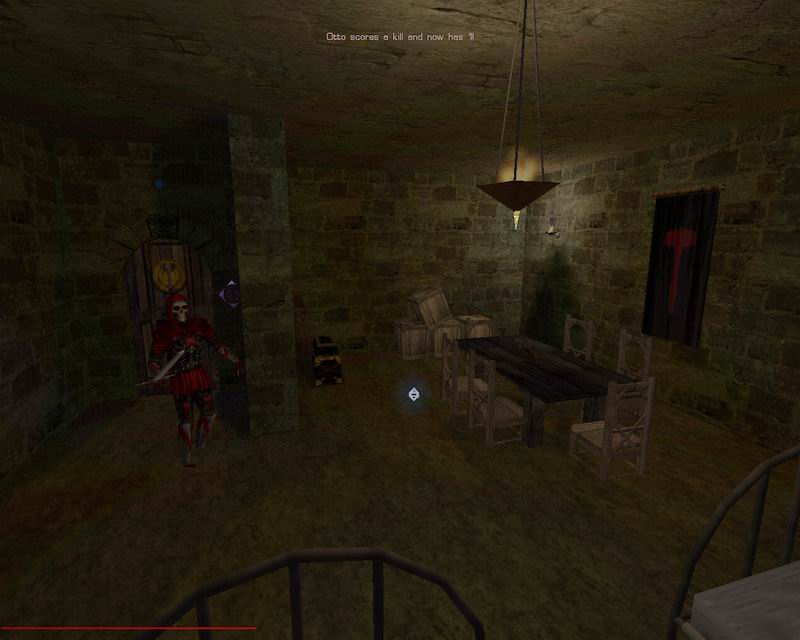
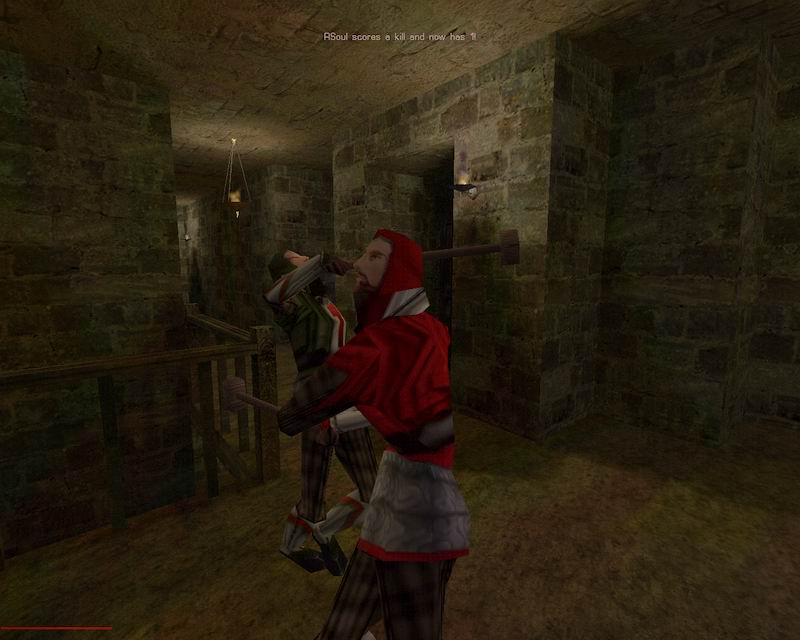
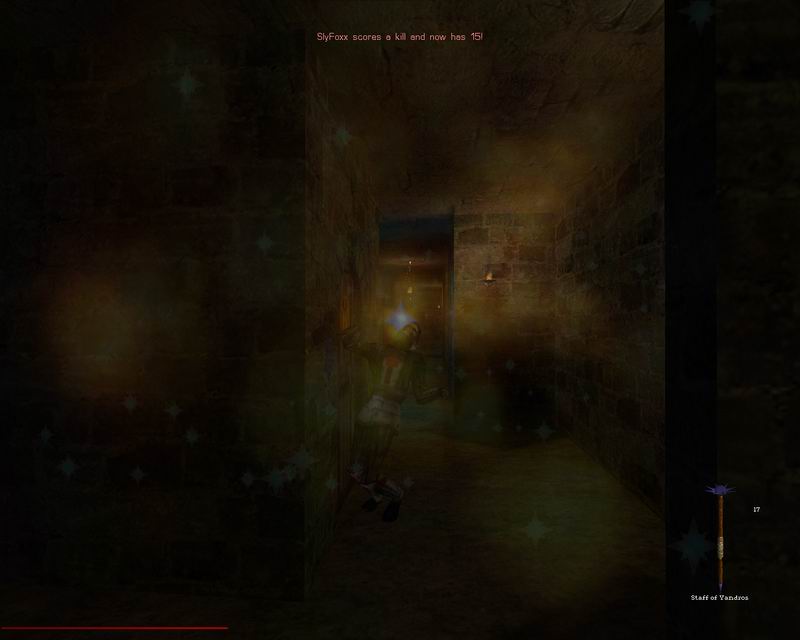
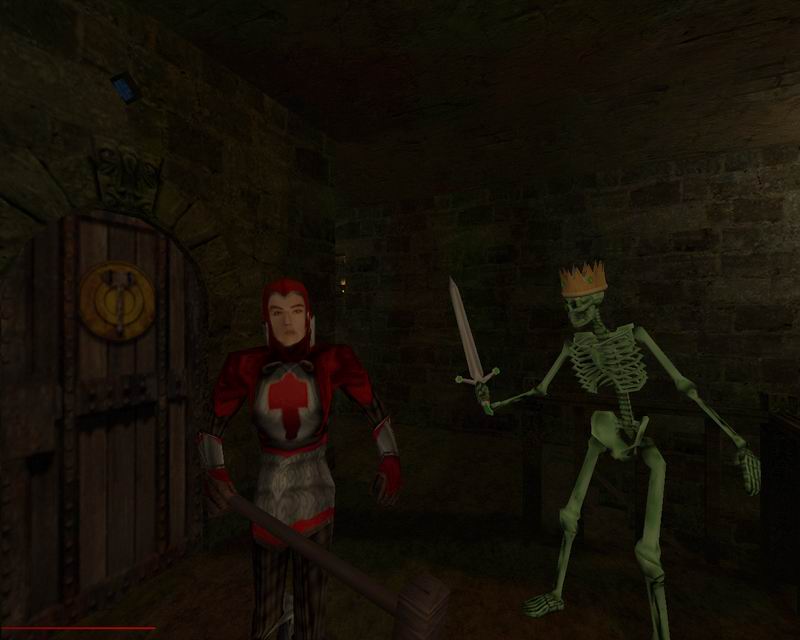
You are Garrett, and are turned loose in a Hammer compound with 8-12 other Hammers and Haunts. The objective is simple – kill or be killed! You have 10 lives, and your opponents have between 8 and 12 each (depending on difficulty). Each time anyone dies (either by you or another AI), they lose a life, and when those lives are all gone, that player is out of the game – this includes you, as Garrett! So your only objective is to outlast all the AI, killing as many as you can without losing all your lives in the process.
Mission 2: Deathmatch
You again play Garrett, and this time the first participant to achieve 25 kills is the winner. In order to win, you must achieve the kill goal before any of the AI do.
You can skip straight to Deathmatch by using the Ctrl-Alt-Shift-End shortcut to end the first mission.
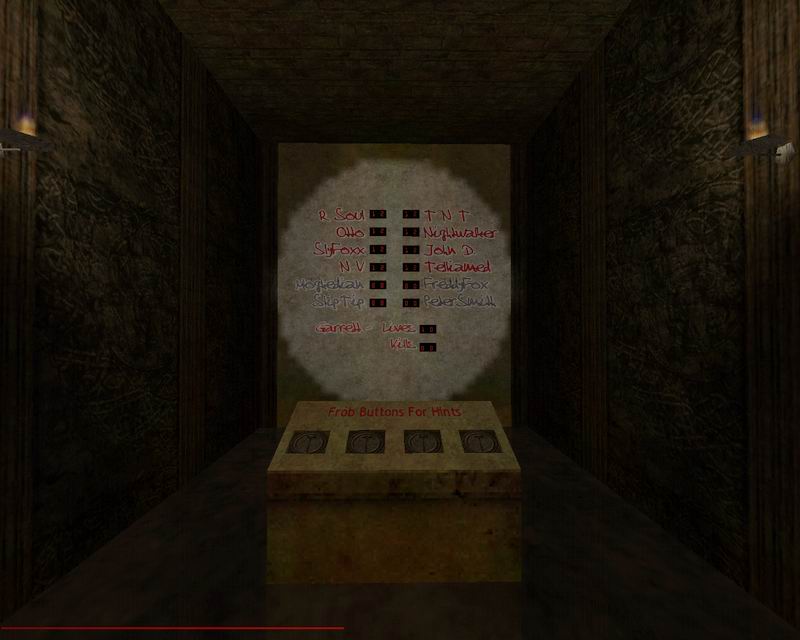
Cast of Characters
Black – appear on all difficulties, Blue – appear on Hard and Expert, Red – appear only on Expert
R Soul as a soldier
TheNightTerror as a soldier
Otto as a swordsman
Nightwalker as a priestess
SlyFoxx as a sergeant
John D. as a haunt
Nameless Voice as a haunt swordsman
Telliamed as a haunt sergeant
Moghedian as the Captain
SlipTip as the Haunt Lord
FreddyFox as the High Priest
Peter Smith as the Haunt General
Disclaimer
Ok, this type of mission certainly isn’t for everyone, and I know some people will not like it. But a number of testers who said they don’t typically like killing missions and didn’t expect to like it actually enjoyed playing it, so I hope if you’re in that category that you at least give it a chance. It can actually be quite therapeutic after a long, stressful day! Plus there are lots of new toys to play with.
Important Play Info
Gameplay Differences – Please Read!
There are a number of things which are not typical of most other missions:
· You can die! Have fun and don’t worry too much about staying alive, it’s OK to die and respawn – it’s part of the fun!
· Garrett has been working out, and is in the best shape of his life – and consequently, you move much faster in this mission than normal. In fact, you don’t even suffer a speed penalty when your sword is drawn, so keep it out – you’ll need it! Be careful though – if you use a speed potion, it’s possible to go so fast that you can die by running into a wall!
· Your current inventory selection will not disappear from the screen, so that it will always be at your disposal in the heat of combat.
· If you are moving or spinning when you die, you will still be moving (or spinning) in that direction when you respawn. Simply press the same movement or rotation key again and it will stop. This is an engine “feature” which can’t be countered.
· Any time you spawn, use the cameras in the control room (see below), or check the status screen, your melee weapon will be deselected. This is a side effect of the custom script being used and can’t be prevented.
· For an intense challenge (and good practice), try winning Deathmatch on Expert using only your sword!
Spawnpoints & Colours
· Your spawn point is orange, while all enemy AI spawn points are blue.
· When an AI spawns, blue particles accompany a normal AI, but red particles erupt when a harder foe spawns.
· Any time an AI is ready to spawn, he can appear randomly at any of the spawn points in the level; i.e. you never know when an AI might emerge from any given spawn point.
· A special ally’s spawn point is green, and it must be frobbed to release him (once per mission). It is randomly placed when the mission starts and is not always in the same location. This ally is not available in Deathmatch mode.
Weapons
You have three new arrows:
· Acid arrows (weapon slot 3/broadhead) – create a cloud of corrosive gas. The gas is highly effective against undead, but only marginally effective against humans.
· Poison arrows (weapon slot 4/water arrow) – create a large cloud of poison gas on impact. Poison is lethal to humans, but ineffective against undead. The tip is glass, so an AI hit by them won’t be poisoned by the tip, but rather by the released gas.
· Explosive arrows (weapon slot 5/fire arrow) – a more powerful version of their fire arrow cousins, they cause a tremendous explosion and do heavy damage to all.
You have three new thrown weapons, which you throw by frobbing from inventory:
· Sawblades – a little hard to aim, but do good damage to all enemies. Can also slash banners.
· Knives – do strong damage to humans, but only moderate damage to undead.
· Hammers – pack a punch to all enemy AI.
There is an additional, quite powerful weapon in the game, but you have to find it.
Restocking Supplies
· Extra weapons & ammo are scattered here and there throughout the mission – more will be found on easier difficulties.
· Most ammo is just laying about or in unlocked chests, but some of it is tucked into corners, and a few require you to find a switch or button to access them.
· There are four secret areas which contain more ammo than normal rooms, if you can find them.
· There are also two storerooms containing more ammo than most other rooms, but they are locked, and to enter you must pick the locks with the threat of enemies all around you.
· On Expert, only the best hand-to-hand players will survive without finding at least some of the secret or storeroom ammo.
· The pace is less hectic in Last Man Standing mode (since you’re only trying to avoid being killed and not racing towards a kill goal), so you should learn the map and scout out the secrets in LMS before trying Deathmatch. That way you’ll already know where to restock supplies when you begin playing DM mode – you’ll probably need it!
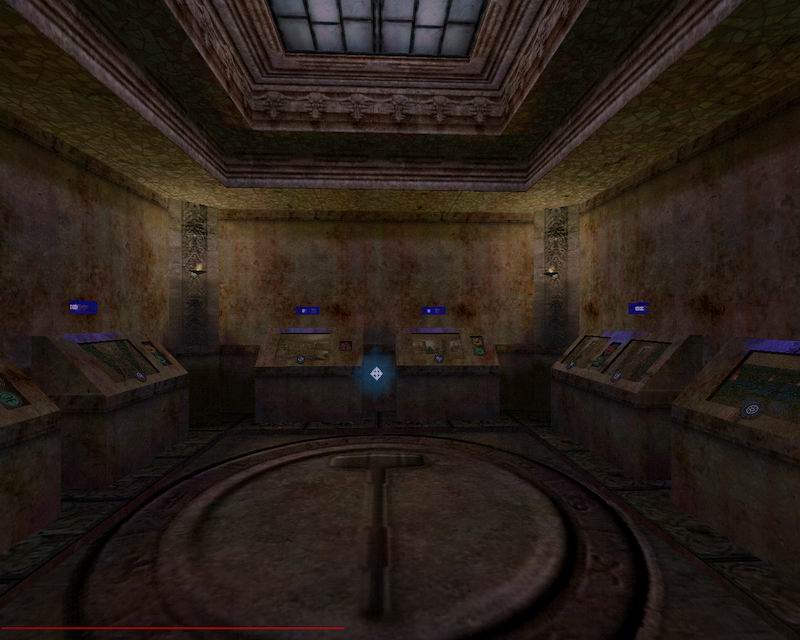
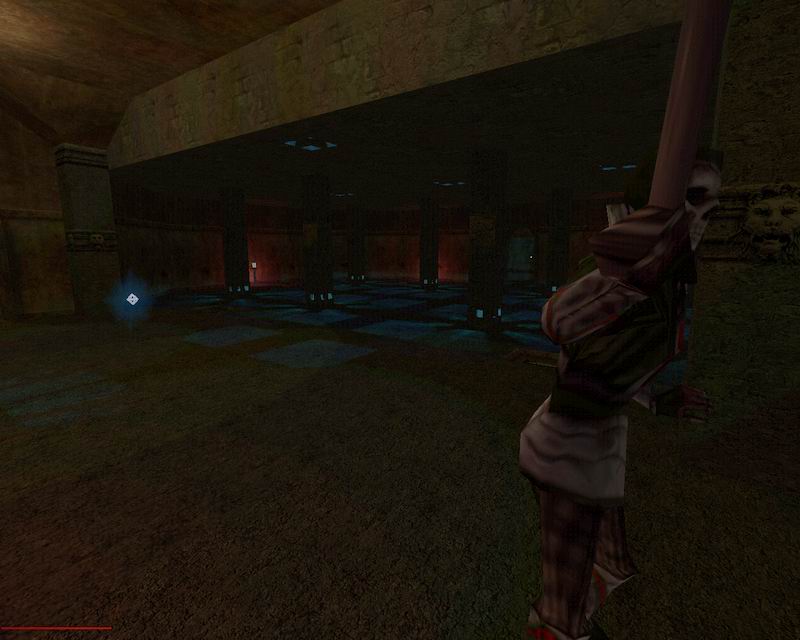
The “Control Room”
There is one room with access to numerous cameras placed throughout the rest of the level, allowing you to “spy” on your foes to see where they are.
· Frob the button on each monitor to see what the camera “sees”.
With each monitor is one or more buttons which remotely trigger traps located in the area viewed by that camera.
· Frob one of these buttons to set off different kinds of traps on the AI in that area.
· Keep in mind the damage type of each trap and whether the AI in the area are undead or human when choosing to trigger a trap. Some trap types don’t damage both undead and humans.
· Choose wisely, as each camera’s trap system takes some time to reset after being triggered.
Note that while viewing a camera monitor you may feel like you’re there, but you will continue to hear the sounds in the control room and not in the remote location.
Most importantly, take care not to linger in the control room – AI will spawn in and patrol into the room, and if you’re busy looking at the monitors, you’ll quickly find yourself dead.
Known Issues
One tester had numerous crashes playing Deathmatch on Expert, but rebooting his computer fixed the problem.
Thanks
My utmost thanks go to Nameless Voice, without whose constant assistance, problem-solving and new scripts this mission would not have been possible.
This mission is dedicated to you, NV.
I would also like to thank:
· Eshaktaar for teaching me how to make thrown weapons.
· Peter Smith for suggesting the use of and providing to me Trent Reznor’s original Quake soundtrack for some of the music selections, they are perfect!
· SlipTip for pointing out how to make shadows under light sources.
· R Soul for fixing the end game bug.
Testers: R Soul, TheNightTerror, Ottoj55, Nightwalker, SlyFoxx, Nameless Voice, Moghedian, FreddyFox, SlipTip, Eshaktaar, Sluggs, and Peter Smith
Credits
Scripts
Nameless Voice, Telliamed
Resources
Textures
David Guerrea, Return To Castle Wolfenstein, Yandros
Music note graphic - http://www.sussexvt.k12.de.us/web/images/stories/Music%20Note_.jpg
“Fun Button” icons - http://www1.istockphoto.com/file_thumbview_approve/3034255/2/istockphoto_3034255_warning_signs.jpg
Fireball icon - http://www.wpclipart.com/space/fireball.png
Main menu graphic features concept art by LGS from T1 (hammerites) and T3 (background), from The Circle
Objects
Eshaktaar – Improved LC Light
Nameless Voice – Numerous objects from the EP, Flame bitmaps, Chairs, blank light gem, fixed emergency light
R Soul – Roulette and game tables
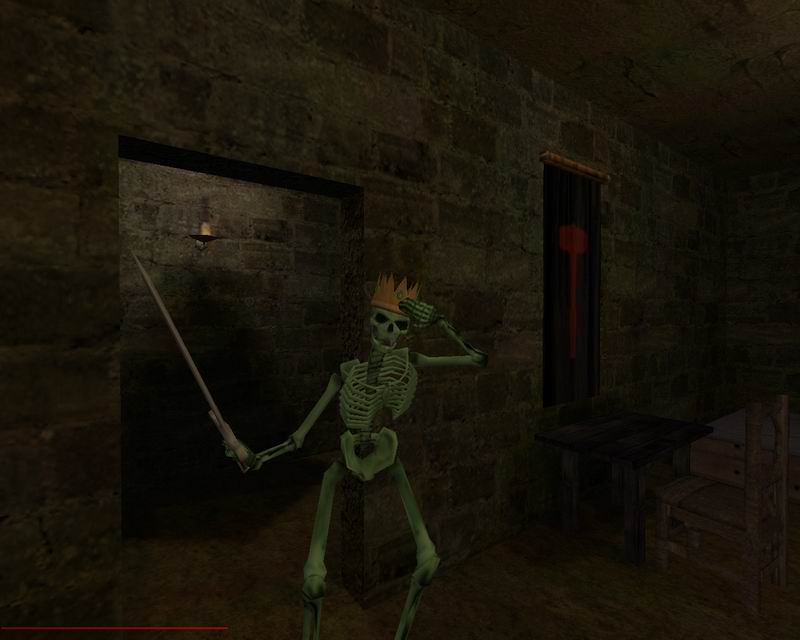
Schwaa – Skeleton King
SlipTip – Spawn points
Sluggs - Bed
Targa – Da Hamma, compass, throwing knife, potions, Staff
Tdbonko - Book
Vigil – Light shaft
Yandros – Everything else
Music Selections
Nine Inch Nails – Conscience and The Life Beneath It All from the game Quake, mixed by Yandros
Antonio Vivaldi – “Summer I” from The Four Seasons
Carl Orff – “O Fortuna” from Carmina Burana
Liquid Tension Experiment – Acid Rain, When The Water Breaks
Dream Theater – The Dance Of Eternity
Haddaway – What Is Love
Sounds & Voices
Two Hammer voices taken from Thief: Deadly Shadows
Haunt2 voice and schema from DEDx, by Rob Hicks
Two sounds (losing music and harp) taken from the game Monopoly Tycoon
Some of the skins, objects and voices are part of the Hammerite Mission Development Kit.
An FPS-Style FM for Thief 2
By Yandros
Release Date: 11/16/07
Version: 1.0
Website: http://www.wearytaffer.com
Mission Base: Circulation of Shadows (now abandoned as a T2 mission)
Build Time: 3 months starting from CoS Alpha 2
Language Support: English
Scripts: All necessary custom scripts are included
Mission Info
Mission 1: Last Man Standing
You are Garrett, and are turned loose in a Hammer compound with 8-12 other Hammers and Haunts. The objective is simple – kill or be killed! You have 10 lives, and your opponents have between 8 and 12 each (depending on difficulty). Each time anyone dies (either by you or another AI), they lose a life, and when those lives are all gone, that player is out of the game – this includes you, as Garrett! So your only objective is to outlast all the AI, killing as many as you can without losing all your lives in the process.
Mission 2: Deathmatch
You again play Garrett, and this time the first participant to achieve 25 kills is the winner. In order to win, you must achieve the kill goal before any of the AI do.
You can skip straight to Deathmatch by using the Ctrl-Alt-Shift-End shortcut to end the first mission.
Cast of Characters
Black – appear on all difficulties, Blue – appear on Hard and Expert, Red – appear only on Expert
R Soul as a soldier
TheNightTerror as a soldier
Otto as a swordsman
Nightwalker as a priestess
SlyFoxx as a sergeant
John D. as a haunt
Nameless Voice as a haunt swordsman
Telliamed as a haunt sergeant
Moghedian as the Captain
SlipTip as the Haunt Lord
FreddyFox as the High Priest
Peter Smith as the Haunt General
Disclaimer
Ok, this type of mission certainly isn’t for everyone, and I know some people will not like it. But a number of testers who said they don’t typically like killing missions and didn’t expect to like it actually enjoyed playing it, so I hope if you’re in that category that you at least give it a chance. It can actually be quite therapeutic after a long, stressful day! Plus there are lots of new toys to play with.
Important Play Info
Gameplay Differences – Please Read!
There are a number of things which are not typical of most other missions:
· You can die! Have fun and don’t worry too much about staying alive, it’s OK to die and respawn – it’s part of the fun!
· Garrett has been working out, and is in the best shape of his life – and consequently, you move much faster in this mission than normal. In fact, you don’t even suffer a speed penalty when your sword is drawn, so keep it out – you’ll need it! Be careful though – if you use a speed potion, it’s possible to go so fast that you can die by running into a wall!
· Your current inventory selection will not disappear from the screen, so that it will always be at your disposal in the heat of combat.
· If you are moving or spinning when you die, you will still be moving (or spinning) in that direction when you respawn. Simply press the same movement or rotation key again and it will stop. This is an engine “feature” which can’t be countered.
· Any time you spawn, use the cameras in the control room (see below), or check the status screen, your melee weapon will be deselected. This is a side effect of the custom script being used and can’t be prevented.
· For an intense challenge (and good practice), try winning Deathmatch on Expert using only your sword!
Spawnpoints & Colours
· Your spawn point is orange, while all enemy AI spawn points are blue.
· When an AI spawns, blue particles accompany a normal AI, but red particles erupt when a harder foe spawns.
· Any time an AI is ready to spawn, he can appear randomly at any of the spawn points in the level; i.e. you never know when an AI might emerge from any given spawn point.
· A special ally’s spawn point is green, and it must be frobbed to release him (once per mission). It is randomly placed when the mission starts and is not always in the same location. This ally is not available in Deathmatch mode.
Weapons
You have three new arrows:
· Acid arrows (weapon slot 3/broadhead) – create a cloud of corrosive gas. The gas is highly effective against undead, but only marginally effective against humans.
· Poison arrows (weapon slot 4/water arrow) – create a large cloud of poison gas on impact. Poison is lethal to humans, but ineffective against undead. The tip is glass, so an AI hit by them won’t be poisoned by the tip, but rather by the released gas.
· Explosive arrows (weapon slot 5/fire arrow) – a more powerful version of their fire arrow cousins, they cause a tremendous explosion and do heavy damage to all.
You have three new thrown weapons, which you throw by frobbing from inventory:
· Sawblades – a little hard to aim, but do good damage to all enemies. Can also slash banners.
· Knives – do strong damage to humans, but only moderate damage to undead.
· Hammers – pack a punch to all enemy AI.
There is an additional, quite powerful weapon in the game, but you have to find it.
Restocking Supplies
· Extra weapons & ammo are scattered here and there throughout the mission – more will be found on easier difficulties.
· Most ammo is just laying about or in unlocked chests, but some of it is tucked into corners, and a few require you to find a switch or button to access them.
· There are four secret areas which contain more ammo than normal rooms, if you can find them.
· There are also two storerooms containing more ammo than most other rooms, but they are locked, and to enter you must pick the locks with the threat of enemies all around you.
· On Expert, only the best hand-to-hand players will survive without finding at least some of the secret or storeroom ammo.
· The pace is less hectic in Last Man Standing mode (since you’re only trying to avoid being killed and not racing towards a kill goal), so you should learn the map and scout out the secrets in LMS before trying Deathmatch. That way you’ll already know where to restock supplies when you begin playing DM mode – you’ll probably need it!
The “Control Room”
There is one room with access to numerous cameras placed throughout the rest of the level, allowing you to “spy” on your foes to see where they are.
· Frob the button on each monitor to see what the camera “sees”.
With each monitor is one or more buttons which remotely trigger traps located in the area viewed by that camera.
· Frob one of these buttons to set off different kinds of traps on the AI in that area.
· Keep in mind the damage type of each trap and whether the AI in the area are undead or human when choosing to trigger a trap. Some trap types don’t damage both undead and humans.
· Choose wisely, as each camera’s trap system takes some time to reset after being triggered.
Note that while viewing a camera monitor you may feel like you’re there, but you will continue to hear the sounds in the control room and not in the remote location.
Most importantly, take care not to linger in the control room – AI will spawn in and patrol into the room, and if you’re busy looking at the monitors, you’ll quickly find yourself dead.
Known Issues
One tester had numerous crashes playing Deathmatch on Expert, but rebooting his computer fixed the problem.
Thanks
My utmost thanks go to Nameless Voice, without whose constant assistance, problem-solving and new scripts this mission would not have been possible.
This mission is dedicated to you, NV.
I would also like to thank:
· Eshaktaar for teaching me how to make thrown weapons.
· Peter Smith for suggesting the use of and providing to me Trent Reznor’s original Quake soundtrack for some of the music selections, they are perfect!
· SlipTip for pointing out how to make shadows under light sources.
· R Soul for fixing the end game bug.
Testers: R Soul, TheNightTerror, Ottoj55, Nightwalker, SlyFoxx, Nameless Voice, Moghedian, FreddyFox, SlipTip, Eshaktaar, Sluggs, and Peter Smith
Credits
Scripts
Nameless Voice, Telliamed
Resources
Textures
David Guerrea, Return To Castle Wolfenstein, Yandros
Music note graphic - http://www.sussexvt.k12.de.us/web/images/stories/Music%20Note_.jpg
“Fun Button” icons - http://www1.istockphoto.com/file_thumbview_approve/3034255/2/istockphoto_3034255_warning_signs.jpg
Fireball icon - http://www.wpclipart.com/space/fireball.png
Main menu graphic features concept art by LGS from T1 (hammerites) and T3 (background), from The Circle
Objects
Eshaktaar – Improved LC Light
Nameless Voice – Numerous objects from the EP, Flame bitmaps, Chairs, blank light gem, fixed emergency light
R Soul – Roulette and game tables
Schwaa – Skeleton King
SlipTip – Spawn points
Sluggs - Bed
Targa – Da Hamma, compass, throwing knife, potions, Staff
Tdbonko - Book
Vigil – Light shaft
Yandros – Everything else
Music Selections
Nine Inch Nails – Conscience and The Life Beneath It All from the game Quake, mixed by Yandros
Antonio Vivaldi – “Summer I” from The Four Seasons
Carl Orff – “O Fortuna” from Carmina Burana
Liquid Tension Experiment – Acid Rain, When The Water Breaks
Dream Theater – The Dance Of Eternity
Haddaway – What Is Love
Sounds & Voices
Two Hammer voices taken from Thief: Deadly Shadows
Haunt2 voice and schema from DEDx, by Rob Hicks
Two sounds (losing music and harp) taken from the game Monopoly Tycoon
Some of the skins, objects and voices are part of the Hammerite Mission Development Kit.
• Uploaded 16.11.2007
• Size 41.11 Mb